home and about pages


Saturday, May 1, 2010

MAY DAY... different things to different people

May 1 is many things: A reason to turn the page on your calendar, the day after April 30, It’s also…a holiday? Huh? May 1—May Day—is a holiday? What is it, one of those Hallmark holidays like Sweetest Day (October 16) and Bosses Day (isn’t that every day? They’re bosses, they can do whatever they want!)? No? It’s a real holiday? And there’s multiple holidays celebrated? OK then.
May Day has origins dating back thousands of years to when the Romans paid tribute to Flora, the goddess of flowers. Other lore ties it to the Walpurgis Night, a celebration in parts of Europe of Saint Walpurga. In other parts of Europe, May Day signifies crowning a girl the May Queen; she then begins the May 1 celebrations, which include dancing around a maypole. In different parts of the world, aspects of paganism are heavily rooted in May Day festivities and tradition.
Around these parts, May Day doesn’t get the attention holidays like Thanksgiving and Halloween receive. But another holiday is celebrated on May 1 in these United States—Law Day. Coined in 1958 by then-President Dwight D. Eisenhower, Law Day was started to recognize and remember the importance of written rule in our country’s founding and it’s role in maintaining order.
Don’t think lawyers deserve an entire day in their honor? Keep it to yourself—they’ll sue you if word gets out. In seriousness, there’s still another reason to call in sick on May 1, 2012, (the next time it doesn’t fall on a weekend)—International Workers’ Day. IW Day casts a light on organized labor and remembers the 1886 Haymarket Massacre in Chicago, where police shot workers striking. The holiday is celebrated on May 1 all over the globe, except here, where it’s moved to the first Monday in September, renamed Labor Day and is celebrated by everyone storing their white clothes away until Memorial Day.
So whatever your reason for breaking out the party hats and kazoos on May 1, make it a good time.

Sugar Free Peach Almond Upside Down Cake

Sugar Free Peach Almond Upside Down Cake
1 8 1/4 ounce can light peaches in fruit juice
1 teaspoon baking powder
1/2 cup unsweetened applesauce
1/4 teaspoon baking soda
5 1/2 teaspoons Equal® Measure or 18 packets Equal® sweetener or 3/4 cup Equal® Spoonful
1/2 teaspoon ground cinnamon
1/8 to 1/4 teaspoon ground nutmeg
1/4 teaspoon salt
1 egg
1/2 cup buttermilk
1/2 teaspoon vanilla
Fruit Topping, recipe below
1 cup cake flour
1/4 cup sliced almonds, toasted

Cut peach slices into thirds; arrange in bottom of lightly greased 8 inch cake pan. Mix applesauce, Equal® , egg and vanilla until smooth in medium bowl. Mix in combined cake flour, baking powder, baking soda, cinnamon, nutmeg and salt alternately with buttermilk, beginning and ending with dry ingredients. Pour batter over peach slices in pan. Bake in preheated 350F oven until cake is browned and toothpick inserted in center comes out clean, about 20 minutes. Invert cake immediately onto serving plate. Spread Fruit Topping over warm cake and sprinkle with almonds. Serve warm. Makes 8 servings.

Fruit Topping

3 tablespoons light apricot preserves with NutraSweet® brand sweetener or apricot spreadable fruit
1 teaspoon lemon juice
1 teaspoon cornstarch
1 3/4 teaspoons Equal® Measure or 6 packets Equal® sweetener or 1/4 cup Equal® Spoonful
1/4 teaspoon maple extract

Mix preserves, lemon juice and cornstarch in small saucepan; heat to boiling, stirring constantly. Remove from heat; stir in Equal® and maple extract.

Food Exchanges:
1 bread, 1/2 fruit

CRUSHED PINEAPPLE CAKE

BEAT TOGETHER:
1/4 c. margerine
1 c. sugar
1 teas. vanilla
2 eggs
FOLD IN:
2 c. flour
1 teas. soda
1 teas. salt
1 can crushed pineapple
Pour into a 9x13 greased pan
MIX TOGETHER:  ( then sprinkle over  batter)
1/2 c. brown sugar
1/2 cup coconut
BAKE: 350 degrees for 35-40 minutes
TOPPING:
Bring the  following  ingredients to a boil ...stirring  constantly
1/2 c. sour cream
1/2 teas. vanilla
1/2 c. granulated  sugar
1/2 c. soft  margerine
Pour over  hot cake...
ENJOY!!!!!

Friday, April 30, 2010

ZINGERMAN'S CHICKEN ALFREDO

Chef Alex enjoying his delicious culinary creation
Chicken Alfredo with Mushrooms and Heirloom Tomatoes
created by Chef Alex Young, Zingerman’s Roadhouse.
1 bag (10-12 oz of pasta)
1 lb. chicken breasts, sliced into strips
4 tbsp olive oil
2 cloves garlic, minced
2 shallots, minced
8 oz mushrooms of choice, sliced
3/4 cup white wine
1 cup heavy cream
½ cup parmigiano, grated
1 tomato, seeded and diced
¼ cup fresh herbs of choice, chopped
Season chicken strips with salt and pepper and sauté in 2
tbsp. olive oil over medium heat until cooked and lightly
browned. Remove chicken but keep warm. Add 2 tbsp.
olive oil, garlic and shallots to pan and sauté for one
minute. Add mushrooms, sautéing for 3 minutes. Add white
wine. Reduce by half. Add heavy cream simmering until
cream has thickened. Cook the pasta in boiling salted
water for 3 minutes. Drain, then toss pasta and chicken with
sauce. Stir in Parmesan cheese, salt and pepper. Garnish
with tomatoes and herbs.
Enjoy!!!!

CHOCOLATE TRUFFLES

Chocolate truffles are traditionally made with ganache shaped into rough spheres by hand and covered in cocoa powder. The powdery coating and imperfect shaping of the confections make them appear similar to dirt covered truffles - the famed culinary fungi. Chocolate truffles are easy to prepare at home and make irresistible desserts that will make you a welcome guest at any holiday party.

Even though the center of a truffle is traditionally ganache, truffles can be made with a variety of fillings ranging from nuts to caramel to nougat. When not made with ganache, these truffles are generally coated in a thin shell of hard chocolate. The truffles in this recipe will be made with a ganache center.

Ganache is simply a mixture of chocolate and cream. For the centers of these truffles, we'll make hard ganache - utilizing significantly more chocolate than cream. A ratio of about 2 to 1 of chocolate to cream by mass will yield a dense ganache appropriate for making truffles.

Obtain 1 pound (455 g) of dark chocolate and 1 cup (235 mL) heavy whipping cream. Be sure to select a chocolate that you enjoy the flavor of.


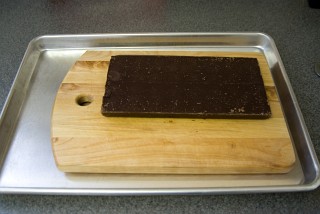
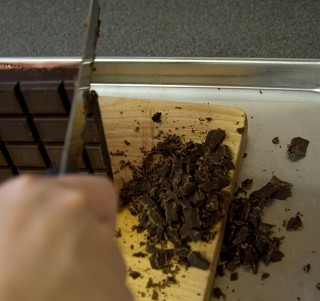
Cut the chocolate into pieces using a large serrated knife (like a sturdy bread knife). Cutting the chocolate into strips about 5 mm apart with the serrated knife will cause the chocolate to break into small pieces. Pieces of chocolate will fall all over the place, so I like to place the cutting board in a sheet pan to catch the chocolate shards.


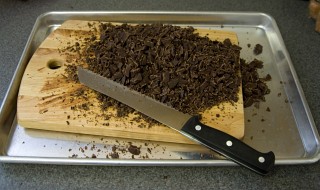
After breaking down the whole pound of chocolate, you should have a bunch of similarly sized pieces. Small, uniformly sized pieces will make melting the chocolate evenly easier. Pour all the pieces into a medium heat proof bowl.


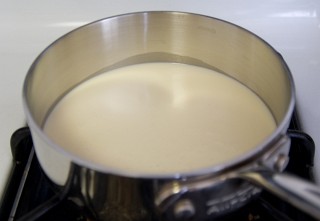
Bring the cup of heavy whipping cream just to a boil. (This is called scalding.)


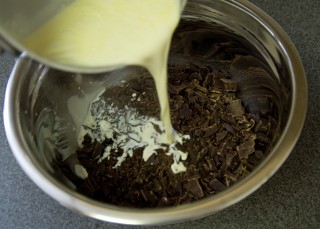
Pour the scalded heavy cream onto the chocolate and allow it to sit for five minutes.


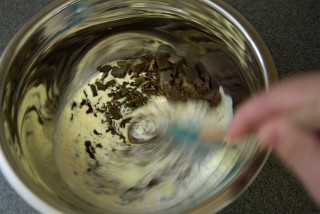
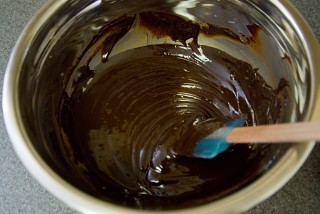
Stir the now melted chocolate with the cream. Chocolate and small amounts of aqueous solutions (liquids containing water) do not mix well - the chocolate clumps up in what is called seizing. However, when a substantial amount of liquid is added to the chocolate, we can make chocolate syrup. A ganache is simply a syrup of chocolate and cream that does not contain enough cream to be liquid at room temperature. Once this mixture cools, it will form a hard ganache that can be molded into shapes.


The melted ganache should be smooth in texture without lumps. If not all the chocolate has melted, you can heat the ganache gently over a hot pot of water. Stir until the chocolate melts and the ganache is smooth.


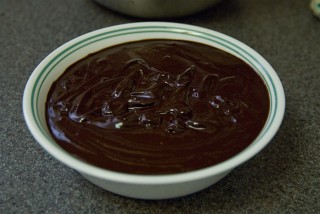
You can transfer the ganache into a smaller bowl to cool. When the ganache is solid, it may be easier for you to scoop out when working with a smaller bowl. Let the ganache cool down and chill for about an hour in the refrigerator to harden. Cold ganache is harder to scoop, but easier to form into a ball.


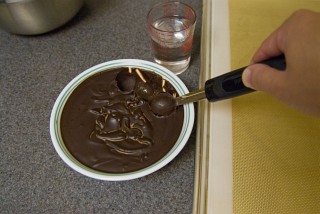
Using a melon baller or small ice cream scoop (such as a #70), scoop out balls of hard ganache and place on a cookie sheet lined with either parchment paper or a silicone baking mat. As the ganache gets warmer, it will have a tendency to stick to the scooping device. You might find it easier to work with after rechilling the ganache, dipping the utensil in ice water, or simply using your hands to form rough spheres.


After forming all the balls, chill the pan in the refrigerator for fifteen minutes to allow the ganache to harden back up and set into their shapes.


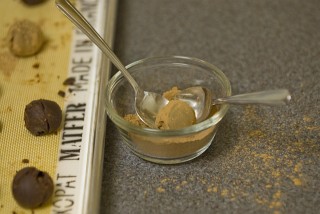
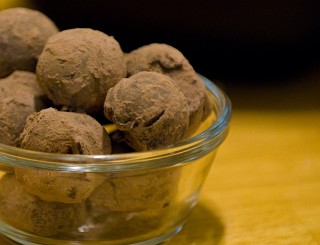
Scoop a little cocoa powder into a small bowl. Use a pair of spoons to pick up and roll each ganache ball in the cocoa powder to coat.


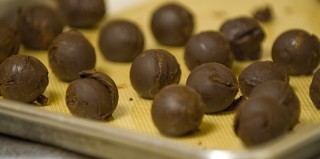
If you prefer a hard chocolate shell, then you'll need to melt and temper some chocolate (usually, a couple ounces will be more than enough to coat the truffles). Once the chocolate has been tempered, use a spatula to spread some onto the palm of one hand. Place the ball of ganache into the layer of chocolate and rotate, coating the ball. Place the truffle on a sheet of parchment paper or silicone baking mat or other nonstick surface for it to cool and set. Repeat the spreading of chocolate on the palm and coating for each truffle. The tempered chocolate will shrink slightly as it cools and clad itself to the ganache. Because of this shrinking action, if it cools too rapidly, the shell can crack, so don't immediately chill them in the refrigerator - allow the truffles to set in a cool room. The ganache should also be allowed to warm up a bit before you coat them. After the chocolate has hardened, chill for 15 minutes in the refrigerator and then remove and store at room temperature. The chocolate coated truffles should not be allowed to touch each other (touching the truffles together can mar the hard surface of the truffles) - so divide them with small paper cups or paper muffin liners.


The cocoa dusted truffles can be packed together without harm. These truffles can be stored at cool room temperature in an airtight container for at least a month - but good luck keeping them from being eaten for that long!

HOMEMADE BISCOTTI

Biscotti are long and hard cookies that many enjoy by dipping into coffee, hot chocolate, or wine. As fancy coffee shops become more and more popular in the United States, biscotti have also become more fashionable (and expensive). It turns out, biscotti is easy to make, and a whole batch costs the same as a single biscotto at Starbucks. Here's my recipe for an Almond and Orange Zest Biscotti that can be enjoyed as is or chocolate dipped.

The name "biscotti" is Italian and literally means twice baked - which is exactly how we'll prepare it. Biscotti can be found in all sorts of flavors, but the most common contain anise, hazelnuts and filberts, and almonds. In this recipe we'll join the flavors of almond and orange (and chocolate). (I should probably also mention that the singular form of biscotti is "biscotto".)

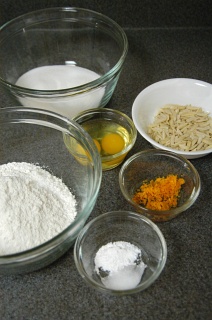
Start by assembling the ingredients: 1 cup (200 g) sugar, 2 large eggs, 3/4 cup (80 g) slivered almonds, 2 tablespoons minced orange zest (about half an orange's zest), 1 teaspoon baking powder, 1/4 teaspoon salt, and 2 cups (250 g) flour.


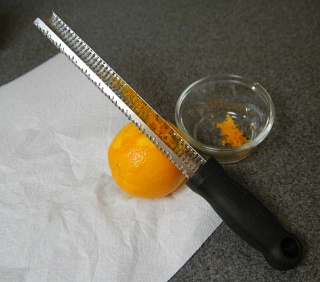
For removing the zest from an orange, I find that when using a Microplane Zester upside down (with the orange under the zester), the zest stays in the device making it much easier to judge how much you've collected. If not using a Microplane (or a zester that produces comparably fine zest), you'll need to mince the zest for this recipe.


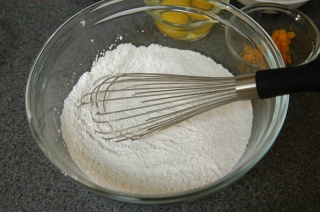
Preheat the oven to 350°F (175°C). Whisk the flour, baking powder, and salt together.


Select a mixing bowl that is large enough to hold all the ingredients and still provide enough room to fold them together without making a mess.

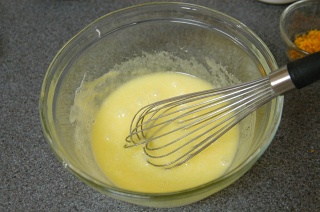
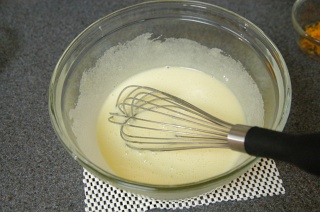
Break two large eggs into the large mixing bowl and add the sugar. Whisk to combine.


Continue whisking the sugar and eggs until the color has lightened to a pale yellow. I like using a spare piece of mesh cabinet liner to keep the bowl from shifting while I'm whisking.


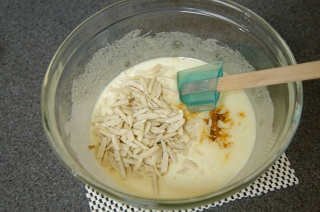
Add the vanilla extract, almond extract, orange zest, and slivered almonds to the egg and sugar mixture. Using a spatula, stir once or twice to combine.


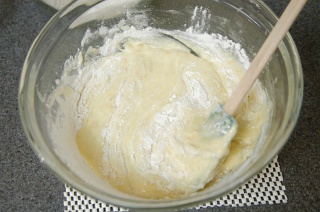
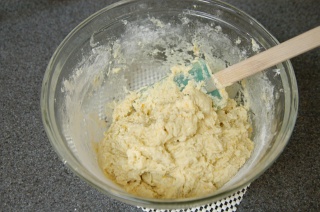
Working in batches, pour enough of the flour mixture to cover the surface of the egg mixture. Use a spatula and fold in the flour using as few strokes as possible. Add more flour and fold until all the flour has been integrated. Folding is performed by using a spatula to scoop from either the side or the middle of the mixture and lifting and "folding" (basically movign the spatula laterally and then flipping it over to drop the mixture) onto another part of the mixture. Rotate the bowl each fold.


The key is not to stir or mix the flour with the liquid too much. Gently folding helps prevents the formation of too much elastic gluten. The presence of too much gluten will defeat the delicate and crisp texture we are trying to achieve and result in a possibly chewy product.


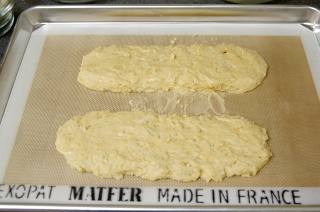
Split the batter in half and place the two rough balls onto a non-stick baking sheet (such as a silicone baking mat or parchment paper set in a half sheet pan). With your hands, form the batter into two loaves of approximately 10-in. (25 cm) by 2 in. (5 cm) each. Wetting your hands just a bit may help with molding the loaves since the batter will be fairly sticky.


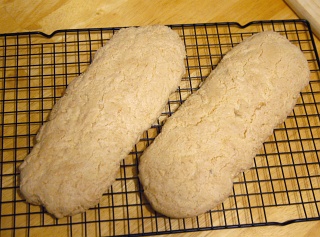
Bake the loaves at 350°F (175°C) for 40 minutes (rotating the pan once after twenty minutes). The loaves should have just started to crack. (Don't wait for big cracks or you might overcook the biscotti.)

Remove the loaves from the pan and place them on a wire rack to cool for at least ten minutes. This cooling step is extremely important to your non-dominant hand as it will be holding the loaf while you cut it in the next step.


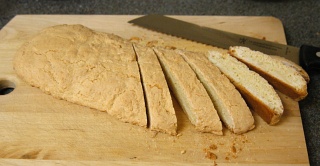
After some cooling, move a loaf to a cutting board and cut diagonally into 3/8-in. (1 cm) thick pieces. Do the same to the other loaf. The interior of each biscotto should still be just a little moist (while the exterior is nice and hard). The crust of the loaf will probably be quite hard, so use a large serrated knife such as a bread knife for this job.


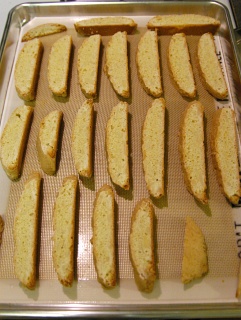
Place the biscotti with a cut side facing up on a half sheet pan and bake for 8 minutes. Remove the pan and flip all the biscotti over so the other cut side is now facing up. Bake for another 7 minutes. Set all the pieces on a wire rack to cool making sure that none of the biscotti are touching each other. If the biscotti are placed too close together, they could get a little soft or soggy as they cool.


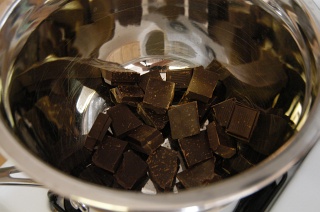
Once the biscotti have fully cooled, they can be consumed as is, or chocolate dipped. To chocolate dip, simply break up the chocolate of your choice (dark chocolate is Tina's favorite) and place in a large metal mixing bowl. I find it easier to dip biscotti in large quantities of chocolate, so I usually make two batches of biscotti (4 loaves), and melt about 250 g (a bit more than 1/2 pound) chocolate. For one batch, 125 g (about 1/4 pound) chocolate should be enough. Using a flat bottomed mixing bowl also makes it easier to dip (otherwise you may need to transfer the chocolate to another container after melting to dip the biscotti).


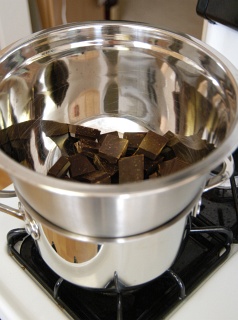
Place the mixing bowl with the chocolate over a saucepan containing about an inch of water (but not so much that the mixing bowl will actually make contact with the water). Bring the water to a boil and then reduce the heat to a simmer. Once the chocolate begins to melt, you can turn off the heat and let the residual heat and steam continue to heat the bowl and melt the chocolate.


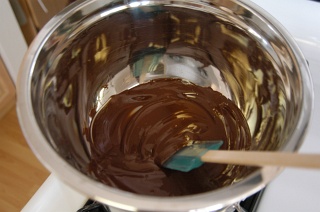
Stir occassionally to check when the chocolate has completely melted. Once the chocolate has melted, you can leave the mixing bowl over the hot water to keep the chocolate warm and melted as you dip the biscotti.


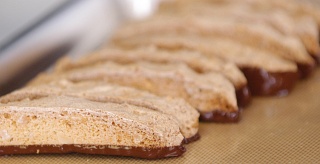
Dip each biscotto in the chocolate by inserting the flat bottom into the chocolate. Use a spatula to remove any excess chocolate and then lay the biscotto (chocolate side down) on a silicone mat or sheet of parchment paper. Repeat until all the biscotti have been dipped. The biscotti can then be left to cool on its own or placed in the refrigerator.


The biscotti tastes best during the first few days, but will keep for up to a month in a sealed air-tight container.

BAKED REUBEN BRAID

if you love a Reuben you will love this impressive concoction. It has all of the flavor braided into a great looking table trophy.
Baked Reuben Braid - recipe photo #1
Servings: 8
Skills: Intermediate
Prep Time: 20 min (not including thaw time)
Bake Time: 30-35 min
Ingredients
1 Loaf Rhodes™ Bread Dough, or 12 Rhodes™ Dinner Rolls, thawed to room temperature
1/3 cup light Italian cheese salad dressing
1/2 pound thinly sliced turkey pastrami
8 slices Swiss cheese
2 cups sauerkraut, drained
1 egg white, beaten
2 tablespoons caraway seeds
Instructions
Spray counter lightly with non-stick cooking spray. Roll loaf or combined dinner rolls into a 12x16-inch rectangle. Cover with plastic wrap and let rest 10-15 minutes. Remove wrap from dough and pour dressing lengthwise in a 4-inch strip down center of dough. Top with pastrami, Swiss cheese and sauerkraut. Make cuts 1 1/2-inches apart on long sides of dough to within 1/2-inch of filling. Begin braid by folding top and bottom strips toward filling. Then braid strips left over right, right over left. Finish by pulling last strip over and tucking under braid.

Lift braid with both hands and place on a large sprayed baking sheet. Brush with egg white and sprinkle with caraway seeds. Bake at 350°F 30-35 minutes or until golden brown. Cool slightly and slice to serve.
 YUM!!! YUM!!!

BANANA CREAM PIZZA

This variation of banana cream pie is so good and easy and is always a pleaser
Banana Cream Pizza - recipe photo #1
Prep Time: 15 min
Bake Time: 20 min
Skill Level: Beginning
Servings: 6

8 Rhodes Texas™ Rolls, thawed and risen
2/3 cup brown sugar
1/4 cup butter, softened
1/3 cup chopped pecans
2 cups banana cream pudding (made from small box directions)
1-2 bananas, sliced
1 cup whipped topping

Press rolls together and roll dough into a 13-inch circle. Place on a 12-inch sprayed pizza pan. Turn up edges of dough to form a ridge. Let rise 10 minutes. Combine brown sugar, butter, and pecans. Sprinkle evenly over crust. Bake at 350°F 20 minutes. Remove from oven.

Cool crust completely. Arrange bananas on crust. Spoon prepared pudding over bananas. Top with whipped topping.
ENJOY!!!!

Thursday, April 29, 2010

UNCOOKED WHIPPED CREAM FROSTING

this frosting is creamy like whipped cream and not sugary sweet like so many frostings are...

1/2 c. shortening
1/2 c. margerine
1/2 c. milk`
3/4 c. granulated sugar
1 teas. vanilla
7 tablespoons flour


the shortening margerine and milk must be at room temperature...place all ingredience in a mixing bowl and beat on high speed for 5 minutes .. do not underbeat or frosting will separate
i add about 1/2 cup powdered sugar to mine and beat it in after the first five minutes
makes lots and freezes great...

SWEETENED CONDENSED MILK

this recipe makes makes 1 cup
double the recipe to make the equivilent of a 14 oz.can.... it can be used in any recipe calling for sweetened condensed milk ... for a fraction of the cost of a store bought can...

3/4 c. granulated sugar
1/3 c. water
1/4 c. margerine ( 1/2 stick)
1 c. powdered milk


in a glass bowl add sugar...water and margerine.. microwave on high 1 1/2- 2 minutes.. until mixture boils..stirring every 30 seconds... pour into blender with powdered milk..process until smooth..refrigerate until needed...

FORGOTTEN COOKIES

2 egg whites
2/3 c. sugar
1 c. chopped nuts
1 c. chocolate chips
1 teas. vanilla
pinch of salt


heat oven to 350...beat egg whites...add sugar gradually
continue to beat until egg whites are stiff
fold in remaining ingredients.. drop by teas. on foil covered cookie sheet
place in oven and
TURN OVEN OFF
leave cookies in oven overnight DO NOT OPEN OVEN AHEAD OF TIME or cookies will fall and be sticky
ENJOY!!!

7-up Scones

these scones are simple quick and light as a feather

1 cup 7-up or other lemon lime soda
1 cup cream
3 cups self rising flour


put all ingredients in mixing bowl... mix gently with a knife until a soft dough is formed ... put onto floured surface and pat into a circle until it is 1/2 inch thick... cut into triangular wedges and put on floured baking sheet bake for 15 minutes at 250 degrees,, till tops are a tan color...remove from oven put on platter to cool..
ENJOY!!!!

COOKIE QUIZ

What Kind of Cookie are You

Find the perfect sugar cookie recipe at popularcookierecipes.com.

counter